

Do you ever scroll through instagram and notice a really great photo but realize there’s something a little “off” about it? The colors are eye-catching, the subject draws you in, but for some reason it’s just a tad fuzzy? I’ve been noticing this recently and realize some people probably aren’t sure of the best way to upload images to Instagram from their computers. I know taking a screen shot of an image in your email may sound convenient, but it’s resulting in poor image quality. If you’re using Instagram to drive traffic to your website, a poor quality image could be taking away from engagement on your posts which results in less traffic to your site.
If you’re like me and you take photos with a camera that’s not your phone, it’s important to know the correct size in which to export the images depending on where the images are being posted. The whole reason you’re shooting with an actual camera is for better quality photos, so it would be a waste of time if you’re just posting screen shots. I edit in Lightroom and export from there, but if you’re using Photoshop or something else to edit the images, you can still benefit from this info.
Since the Instagram update last year where they started allowing for portrait and landscape images instead of only squares, there are different image sizes depending on the aspect ratio of the image you’re posting.
Square photo (aspect ratio 1:1): 1080px in width x 1080px in height
Portrait (vertical) photo (aspect ratio up to 4:5): 1080px in width x 1350px in height
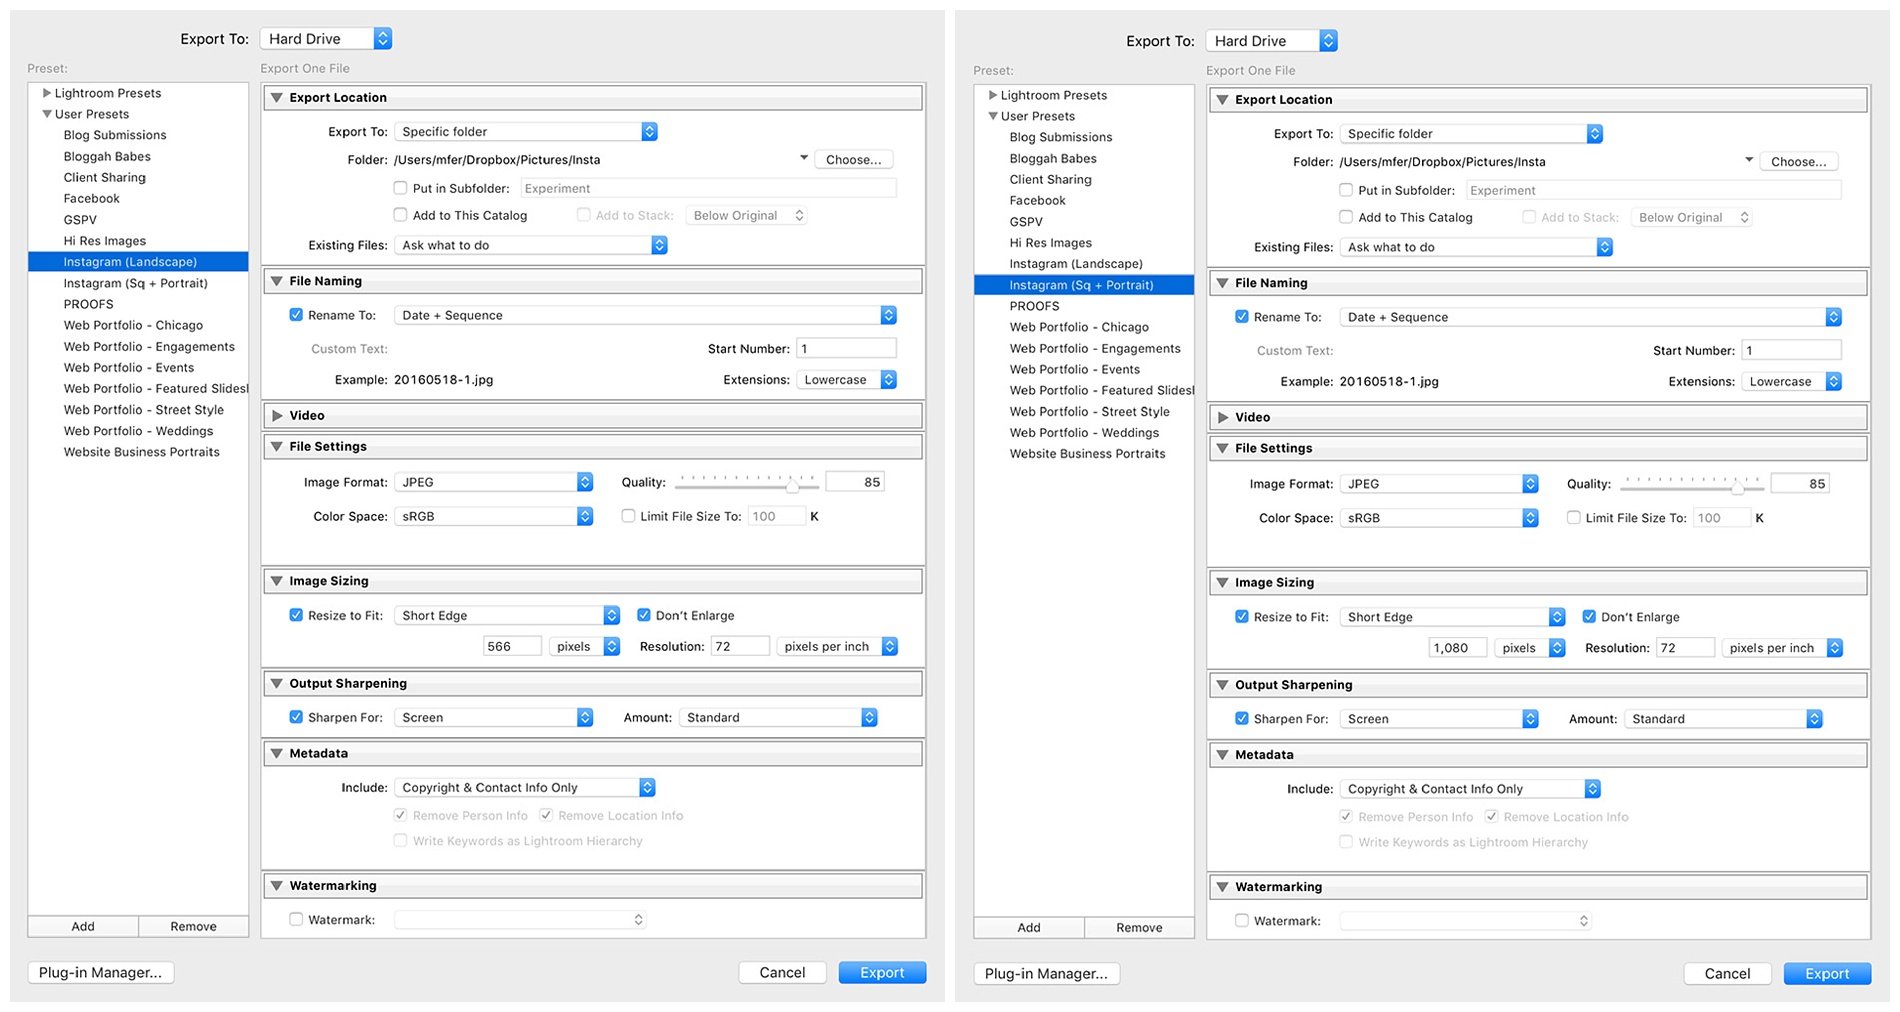
Landscape (horizontal) photo (aspect ratio up to 1.91:1): 1080px in width x 566px in height
Here are the steps I take to ensure crisp instagram photos:
1. After editing my image in Lightroom, I save it to Dropbox. I made an export preset so I don’t have to change the setting each time I export the file. With just one click, my photo is sent straight to my Dropbox folder. In the images below you can see the export settings are different for landscape and portrait images. (I made the same export option for portrait and square since the shortest edge is still 1080px for each. I also don’t export images as squares since you can just crop it to a square in the instagram app if you want to.)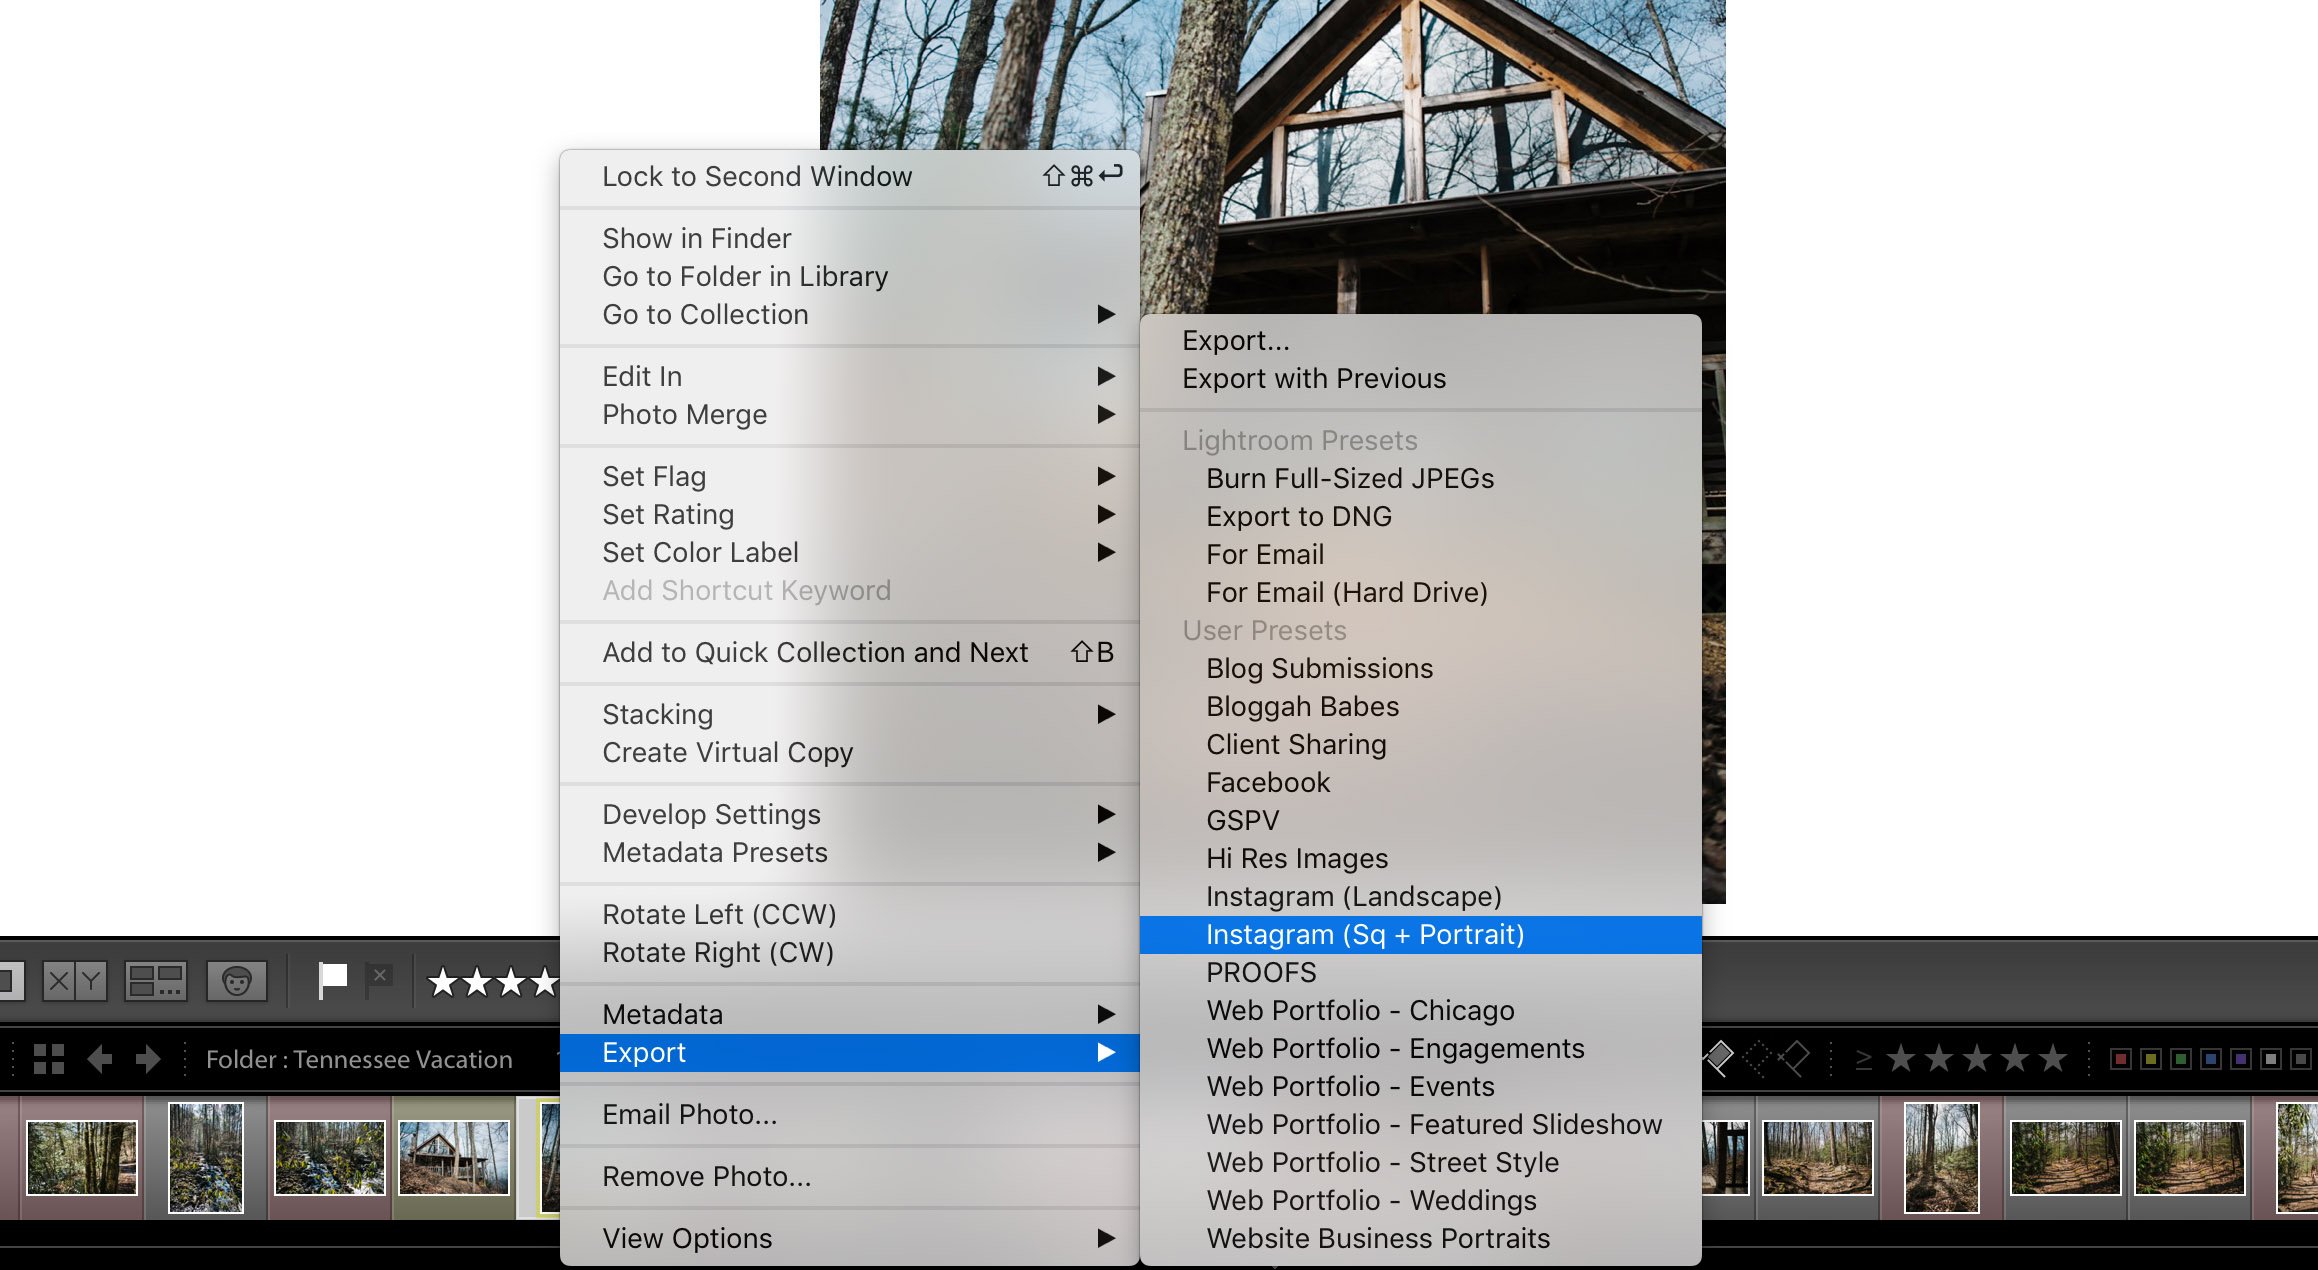
2. I created a specific folder in Dropbox to store the images I’ll be posting to Instagram. Since the Dropbox app syncs to my iPhone, I can find it easily through the app. This is way more convenient than saving a file to your computer and emailing it to yourself.
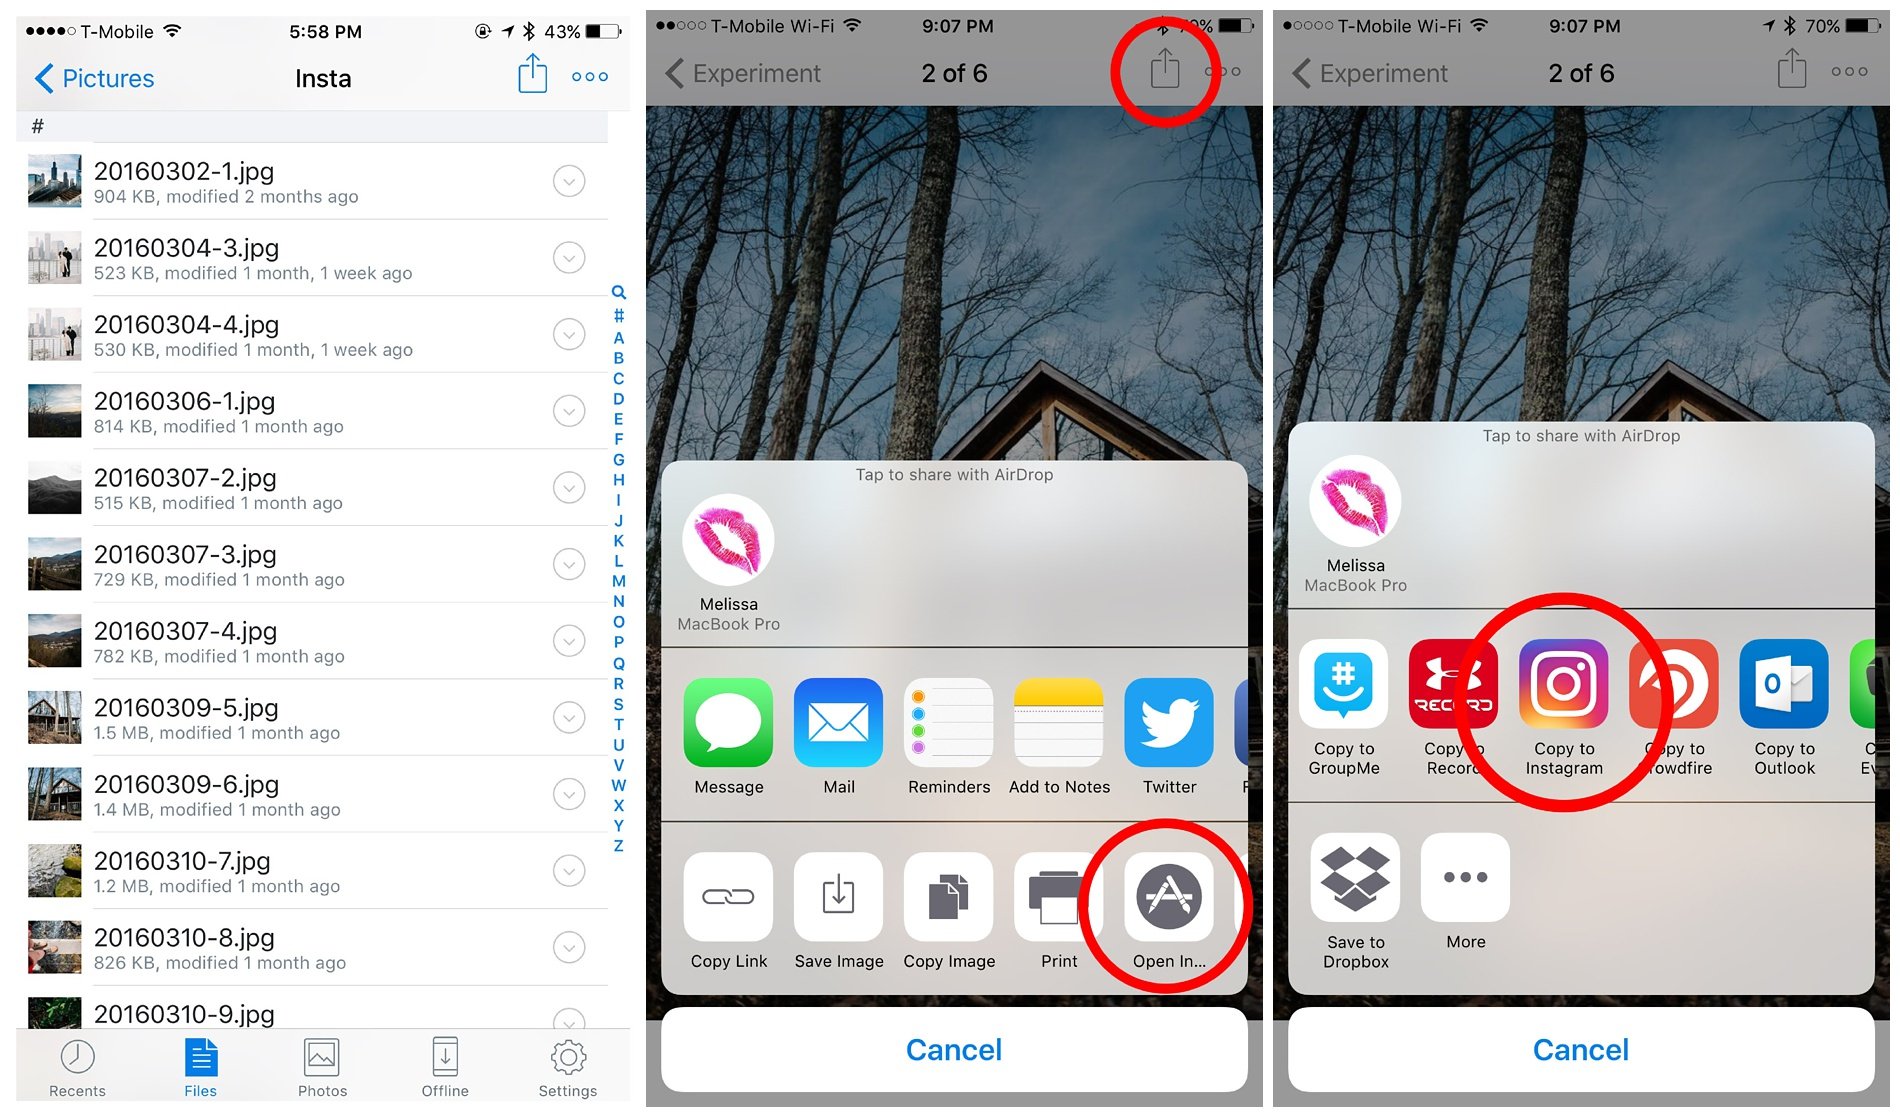
3. Once you find the image in Dropbox, the easy thing to do would be to screen shot the photo, but this is where you make the mistake of losing image quality. If you have an iPhone, click the share button on the top right. It’ll pull up options to share. Click on the Open In… option and it’ll bring up Instagram in the row of apps for sharing. It opens the image right in Instagram without any extra steps!
And that’s it! With just a few extra steps to ensure sharp instagram photos, you could be driving more traffic to your site and gaining more clients. If you have any tips on getting extra sharp photos for instagram, share them in the comments below!


Thanks for posting this! I am a lightroom newbie and I didn’t know you could make an export preset! Most of my Instagram photos are taken on my phone but sometimes I have those extra lightroom ones I want to use. This will come in handy! Bookmarked!
Perfect! I’m so glad it helped you, Lydia! Yes, when you’re in Export, there’s the option to Add or Remove export presets at the bottom left. You can create different user presets depending on how the images will be used or where you’re storing them. Thanks for reading!
This was so helpful! Thank you so much! Do you ever have a problem with the quality decreasing a couple hours after you’ve posted the photo? This has been happening a lot to me recently, where the photo will be sharp for the first few hours and decrease in quality significantly after 2-3 hours. Thank you!
Thank you, Lauren! I have not seen that happen, but I also haven’t really been looking. That’s so strange! I know they’re updating a lot recently so hopefully it will be resolved soon.
I had been googling crazily for this info. Thanks a ton, Melissa. Will keep exploring your site more. Keep up the good work 😀
Thank you, Oliver! Glad it helped!
I noticed my photos lose quality after a few hours as well, any ideas why ?
I haven’t noticed that at all! That’s really interesting. I googled it and found this on Instagram’s Help page: https://help.instagram.com/276722745781769/
I also saw a few people reporting the same issue on iOS. Seems just something with the app itself and can’t be fixed on the user’s end. Hopefully Instagram will resolve that issue soon!
thanks for the post. I used your exact settings for portrait and my images are still not cropping correctly and the whole image wont fit.
thank you!!
Hey Ryan, The aspect ratio for portrait or vertical images on Instagram is 4:5. Your camera (like mine) probably shoots at 3:2. The settings I posted don’t guarantee your portrait image won’t be cropped. Mine always get cut off a bit if I’m posting a portrait/vertical image. That’s why I have it export the small edge as a fixed size since the long edge will be cropped. 😉 The only way for it to not be cropped in Instagram is to shoot at 3:2 or crop it that way before exporting. I hope that helps!
Got it, many thanks!
This is awesome! Have you ever used airdrop and just airdropped it from your computer to your phone, does that have the same affect as Dropbox? Or does that loose quality too?
I’ve used airdrop to transfer files and haven’t noticed a loss in quality. I edit in Lightroom and you’d still have to save the image file somewhere in order to airdrop it, so I just save it to dropbox. That way it’s one step and automatically syncs to my phone instead of having to share the file with my phone and save it somewhere else.
Hi there! Thanks for all of the helpful info! I was wondering does emailing the photo to yourself result in low quality?
I haven’t emailed myself an image file since I started using Dropbox. It’s just way too many unnecessary steps! I wouldn’t imagine it would mess with the quality too much. Feel free to give it a shot yourself and let me know what you think!
I tried these settings but man my images are still so pixelated. The original file of the photo is 5472 × 3648. do you think this may be why?
Hm, not sure why it would be pixelated. Did you delete the image and try again? The only reason the dimensions would cause it to pixelate is if you’re enlarging it to resize it.
I found this very informative. Did you write this before Lightroom Mobile? I ask because I’m wondering if you use Lightroom Mobile to upload straight to IG or still prefer the dropbox route? Thanks.
Thanks, Scott! I haven’t tried uploading from Lightroom Mobile so I’m not sure how to go about that. I could give it a shot, but if you come up with anything, feel free to share!